
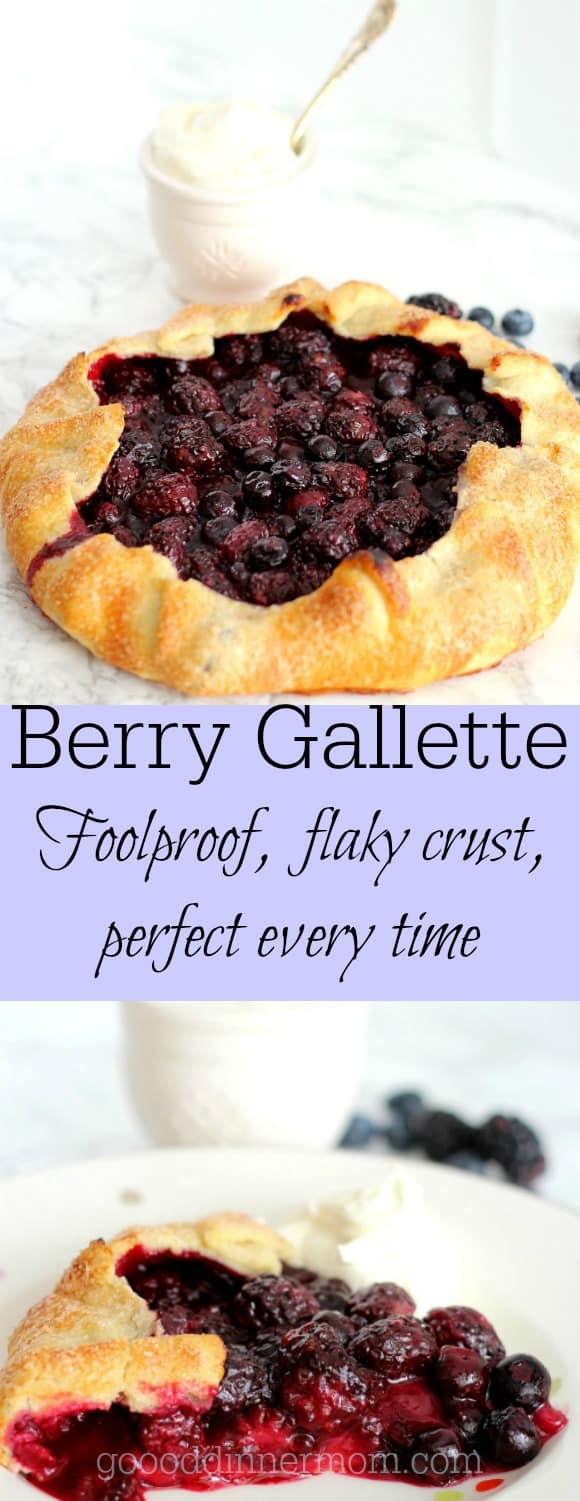
Easy enough for beginner bakers, this rustic berry galette is one of those desserts that looks impressive without requiring perfect pie-making skills.
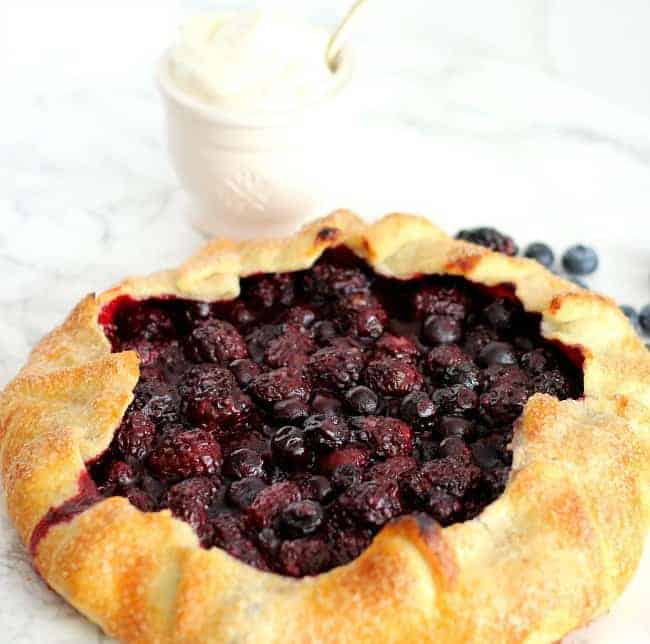
Berry galette is one of the easiest summer desserts you can make. The rustic free-form crust means nothing has to look perfect, and the flaky pastry paired with juicy berries feels every bit as special as pie — with much less effort.
Why You’ll Love This Berry Galette
- Rustic and forgiving — no pie pan or fancy crimping needed
- Flaky, buttery crust with juicy berry filling
- Easy to customize with whatever berries you have
- Perfect for summer entertaining, cookouts or casual weekends
- Extra dough can be refrigerated or frozen for later
Ingredients in Berry Galette
- Mixed berries like blackberries, blueberries or raspberries
- Fresh lemon zest and juice
- Sugar and flour for thickening
- Cold butter for flaky pastry
- Ice water
- Egg white for a golden crust
How to Make a Berry Galette

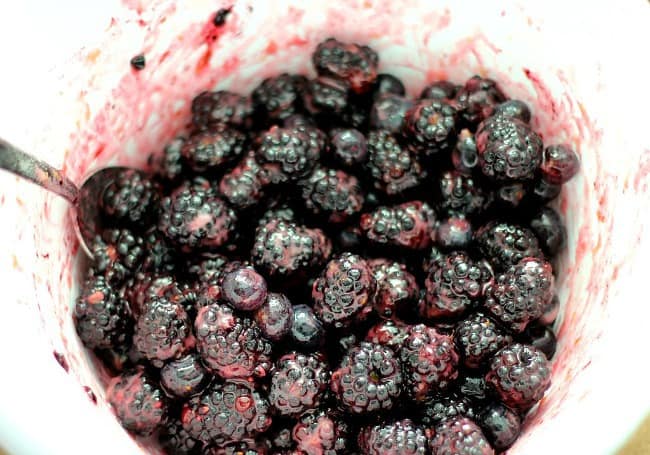
The berry filling comes together in minutes with sugar, flour and fresh lemon.
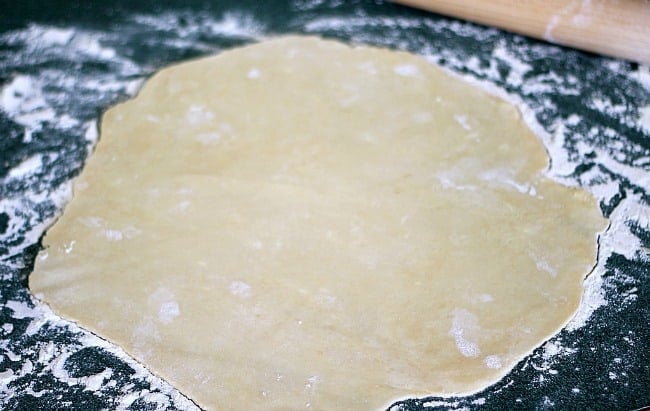
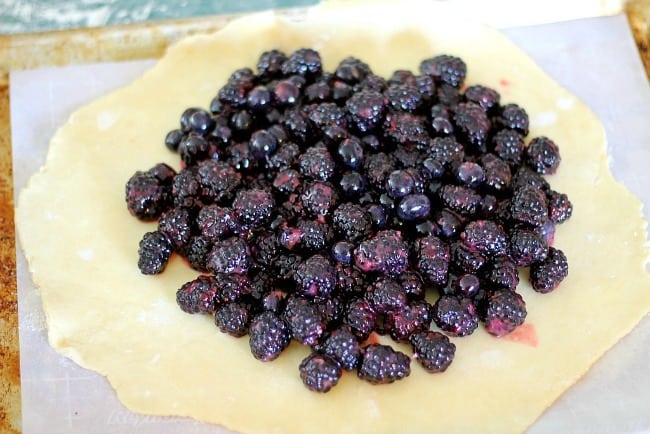
Don’t worry about making a perfect circle — rustic is exactly what you want.
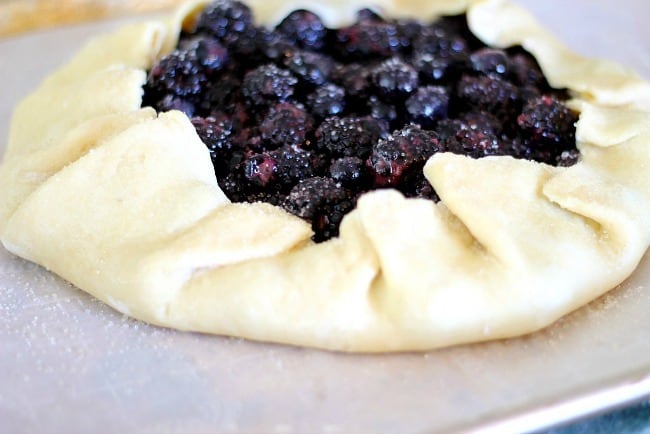
Fold the edges loosely over the berries to create that classic galette shape.
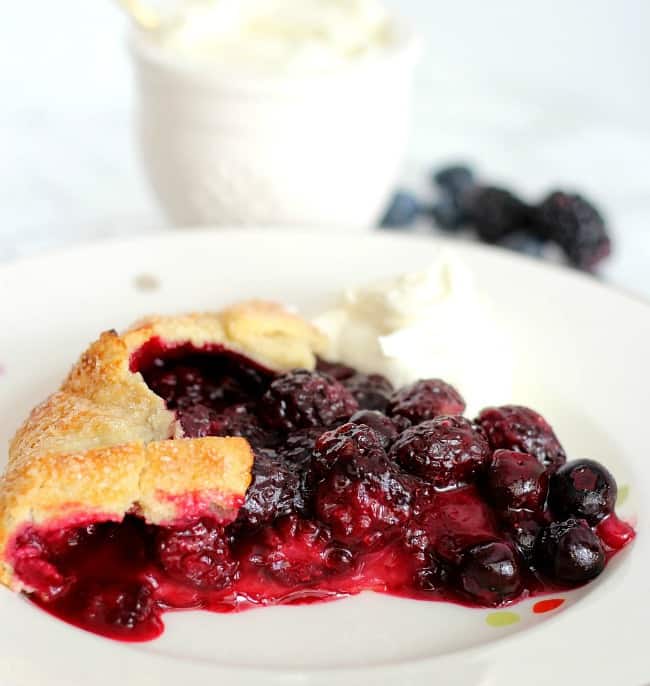
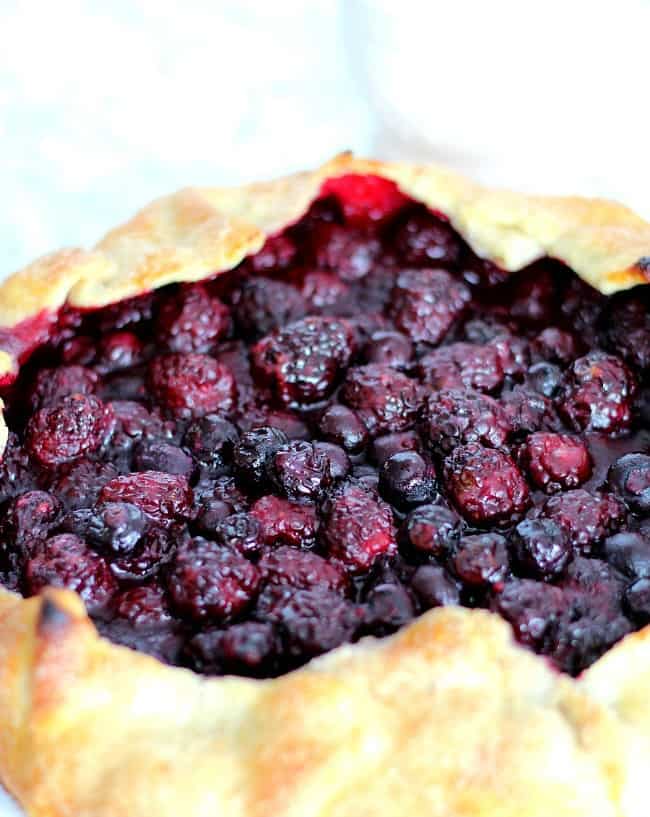
The buttery crust turns golden and flaky while the berries become jammy and bubbling.

Tips for the Best Berry Galette
- Use very cold butter and ice water for flaky pastry
- If berries are especially juicy, add a light dusting of semolina or breadcrumbs under the filling
- Chill dough briefly if it becomes too soft while rolling
- Let the galette cool slightly before slicing so the filling can set a bit
FAQs
Can I use frozen berries?
Yes, but thaw and drain them first so the filling doesn’t become watery.
What berries work best in a galette?
Blackberries, blueberries, raspberries and strawberries all work beautifully alone or combined.
Can I make the dough ahead of time?
Yes. The dough can stay refrigerated for up to 5 days or frozen for up to 2 months.
Does a galette have to look perfect?
Not at all. The rustic shape is part of the charm.
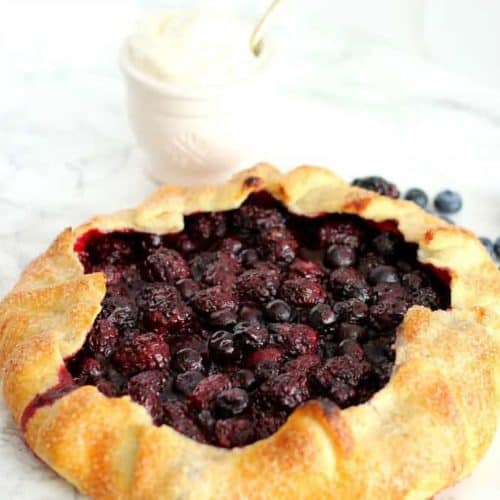
This berry galette is the kind of dessert that feels relaxed and effortless in the best possible way. Serve it slightly warm with whipped cream or vanilla ice cream. It instantly feels like summer. For more super easy fruit pastry desserts, try my Easy Puff Pastry Tarts recipe using peaches, pears, or apples.
Recipe note: The printable recipe will yield 3 disks of dough for 3 galettes, but the fruit listed is enough to fill one galette. You will mix the dough, divide into 3 disks and save two for later. Make one now with the amount of fruit listed.
Easy Berry Galette {Rustic and Foolproof}
Ingredients
For the flaky pastry dough:
- 4 cups all-purpose flour
- 1 tsp salt
- 24 Tbsps unsalted butter, cut into cubes (3 sticks)
- ¾ cup ice water
For the Berry filling:
- ⅓ cup sugar
- 3 Tbsps flour
- 4 cups blackberries blueberries or a mixture
- Lemon zest from one large lemon
- 2 Tbsps fresh lemon juice
For finishing before baking:
- 1 egg white whisked
- 1 Tbsp granulated sugar also raw or turbinado looks nice
- 2 tsps cold butter cut into tiny cubes or grated
Instructions
- Mix the dough:
- In a food processor, combine flour and salt and pulse briefly to mix. Scatter the cubed butter over the top and pulse just until the mixture forms coarse crumbs about the size of peas. Drizzle ¾ cup ice water over the flour mixture and pulse just until the dough starts to come together.4 cups all-purpose flour, 1 tsp salt, 24 Tbsps unsalted butter, cut into cubes, ¾ cup ice water
- Transfer the dough to a work surface, divide into 3 equal pieces and press each into a flat disk. Set 1 disk aside and wrap the remaining 2 disks in plastic wrap for future use (see note below).
- Preheat an oven to 425°F. Use middle oven rack. Line a baking sheet with parchment paper.
- Place the dough on a lightly floured surface and roll out into a 13-inch round. Fold the round in half, transfer to the prepared sheet and unfold the round.
- Fill and bake the galette:
- In a small bowl, mix sugar and flour together. In a medium bowl, add the berries, lemon zest and lemon juice. Toss the sugar/flour mixture in with the berries and stir lightly until well mixed. Spoon the filling onto the dough, leaving a 2-inch border uncovered around the edge. Fold the edge up and over the filling, forming loose pleats. Using a pastry brush, lightly brush the crust with the egg white, then sprinkle 1 tablespoon of sugar over the crust and top of the berries. Now dot the 2 teaspoons butter cubes (or grated butter) over the top of the fruit. You don't need a lot of this, but doing so will help the fruit achieve a nice sheen after baking.4 cups blackberries, Lemon zest from one large lemon, 2 Tbsps fresh lemon juice, ⅓ cup sugar, 3 Tbsps flour, 1 egg white, 1 Tbsp granulated sugar, 2 tsps cold butter cut into tiny cubes or grated
- Put the galette in the 425F degree oven and immediately turn the oven down to 400F degrees and bake for 25 minutes, or until the filling is bubbling and the pastry is golden brown. (During last 5 minutes, if the crust is really brown before the filling bubbles, place a piece of aluminum foil over entire galette until the end of baking so crust doesn't burn.)
- Transfer the galette to a wire rack and let cool slightly. Cut into wedges and serve.
Notes
- The dough recipe makes 3 disks. Use one now and refrigerate or freeze the remaining dough for later use.
- Extra dough can be refrigerated for up to 5 days or frozen for up to 2 months.
- Refrigerated dough often becomes even flakier after resting overnight.
- If using especially juicy fruit, lightly dust the dough with semolina flour or breadcrumbs before adding the filling to help prevent a soggy crust.
- Frozen berries can be used, but thaw and drain them first.
Recipe adapted from Williams Sonoma.


This was better than pie! The crust/dough is so flaky and not heavy at all! My two daughters (10,8) each made one from the three disks and they were so easy to make! We did one blueberry with lemon and one peach. Served with vanilla ice cream, they both got devoured!! They are very excited to make hand-pies with the third dough ball.
Oh my goodness, your comment is just the best! First of all, good job teaching your young daughters how to navigate in the kitchen! So important. I’m so glad you liked the recipe and LOVE the idea of the hand pies with this dough. It will be fabulous. Good job changing it up too! Blueberry with lemon and peach! Love it.
Love this… so delicious!! I brush melted marmalade (mixed with a bit of water) over it to “gloss” it up and enhance the presentation. Yummy!
Absolutely amazing! This is soo easy to make and yet it is down right perfect. Nice recipe Sally, Im adding it to my recipe book.
Simply outstanding! I served this warm, although I bet it would taste just as delicious cold. The filling blended so nicely, It truly melted with each bite. Cant wait to make this again!
What an excellent recipe! I visited France a few years back and tried a galette there, so I was very pleased to find this recipe. It came out great and tasted as delicious as the one I had in France. Merci beaucoup for this great recipe!
Just a quick FYI: the notes on storing the extra dough state “Extra disks can remain in fridge for up to 5 days, or refrigerate for up to 2 months.” I assume you meant to say FREEZE for up to 2 months.
Thank you for the recipe, I’m batching up a bunch of single serving beef pot pies for my eldercare client this weekend, and this dough looks like winner!
Thanks for the correction, Jeanette! You’re right, I meant “freeze”. I’ll go in an correct this right now. I’m honored that you’re using the dough for some important people. Our elders deserve the best! I’m confident this recipe will be delicious for them.
This has become my go-to method for using up fruit of various kinds. I love how you get extra disks that you can freeze for a future easy dessert.
Keri- Right? One of my favorite parts of this recipe is the extra to freeze for later.
What a beautiful dessert! I didn’t change anything in this recipe and it came out so wonerfu!! It is is easy and quick to make. definitely will make it again.
This looks amazing! I can’t wait. I’m making this today!