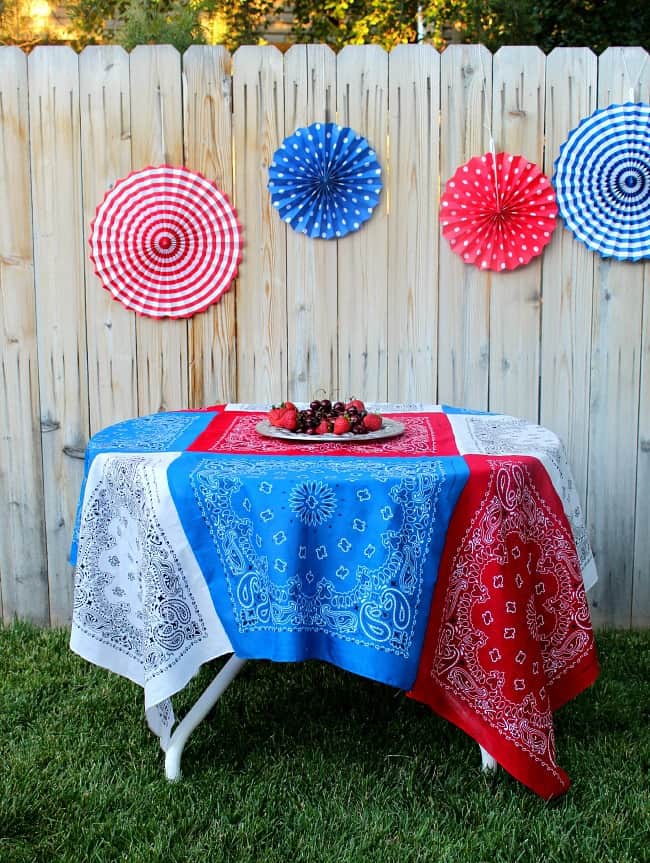
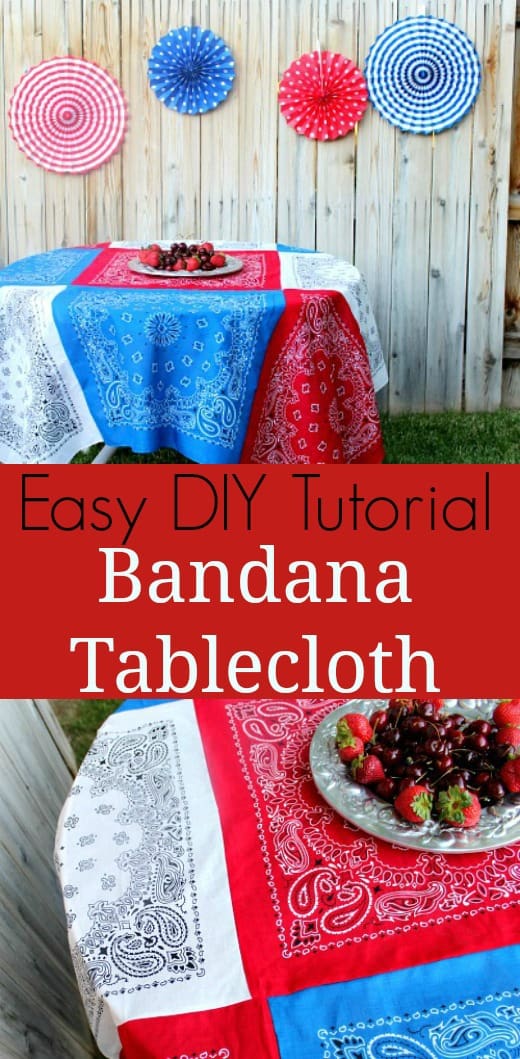
Whether you’re just thinking of taking up sewing or you’re an accomplished seamstress, this easy bandana pathwork tablecloth whips up in less than an hour.
Dear Readers: I know this is a deviation from Good Dinner Mom recipe posts. My focus is definitely on sharing recipes and all things cooking, but I also really enjoy sewing and hope that from time to time, you’ll let me share a few fun and simple craft projects that involve the use of a sewing machine.
My mom taught me how to sew my own clothes when I was a young teenager and I have enjoyed creating a variety of projects using a sewing machine ever since. 
Just like learning to cook, the craft of sewing can also be fun and rewarding. Whether you’re just learning how to sew or if like me, you’ve been sewing your whole life, this cute bandana patchwork tablecloth is something you can quickly make as long as you have access to a sewing machine. (This project came together in about an hour and much of that time was spent just ironing the bandanas.) The seams are very forgiving and do not require exact corner matches which are near impossible anyway because all your bandanas won’t be exactly the same size. And it will actually look cute this way.
The possibilities for this project are endless. Hosting a wedding or baby shower? Use the bride’s colors, or pink and white or blue and white for the mother-to-be. Great for a birthday party or Superbowl party. Need tablecloths for an outdoor Western-themed wedding or party?
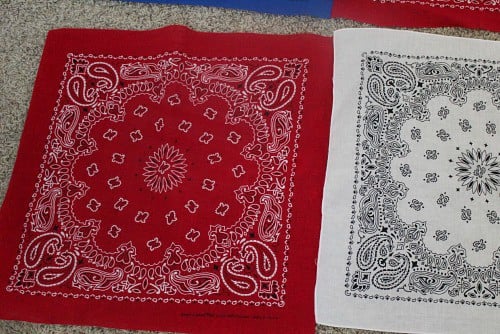
I bought my bandanas at Hobby Lobby and I know JoAnn’s also carries them. Hobby Lobby is the best price option though by far at only .99 each. (I have no affiliation with and do not receive compensation from either store)
Materials List:
Each bandana is 22″ square. Measure the length of your table plus your desired overhang. Divide this number by 22. Write down that number. Now measure the width of your table plus your desired overhang. Divide this number by 22. Multiple this total to the first number you wrote down. That’s how many bandanas you need. Example: If you want a 12″ overhang on on both sides of your table and your table is 60″ long and 40″ wide: 60″ plus 24″ overhang= 74. 74 divided by 22 is 3.36 (round up to 4). 40+24= 24. 64 divided by 22 is 2.9 (round up to 3). 4×4=16. You will need 16 bandanas for this table.
Essential tools: Measuring tape for initial measurement only, hot iron and ironing board, straight pins, sewing machine using simple straight stitch to make the tablecloth, thread in the color of one of the bandanas, scissors. Have a seam-ripper handy, just in case.
Seamstress note for fastidious crafters: When a project requires, I am very precise with pinning, seam matching, etc. But this is not one of those times, which is why this will be a success for all levels of expertise. Also, I did not prewash my bandanas but you certainly can. Just do not put them in the dryer as they’ll shrink considerably and unless you accounted for this in your measuring, you’ll be unhappy. The finished tablecloth can be washed and hung to dry (because how cute would this look hanging on a clothes line or even over your back fence in the sun!
Step 1: Heat your iron. Quickly iron each bandana to remove the creases, using a spray bottle of water or the spritz button on your iron to get out stubborn creases.
Step 2: Lay out your bandanas, right side up, on the floor until you’re satisfied with the pattern you’ve created using your different color bandanas.

Step 2: You will first sew the long rows of bandanas. So, starting with the first two bandanas of one row, pick them up where they touch each other and place them right sides together.
Here is a tip when matching your squares. MAKE SURE you are sewing one square to the other where they were touching when you had them laid out! It is easy to grab them up and think you’re sewing them together at the right seams only to realize you seamed the end of one to the wrong end of another and now you have out-of-order-squares-and-now-I-have-to-expletive-unpick-my-seam! I HATE unpicking seams, so take note. You’ll be glad you did. Line them up at the beginning of where you will sew them. I do not bother with pins for this step because if you just make sure the sides are “pretty well” together as you go, this isn’t necessary (time saver and remember this is a forgiving project).
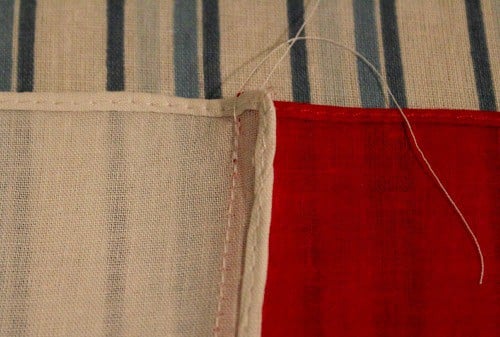
Sew a straight stitch 1/4″ from edge, back-stitch the beginning and end of your seam to secure it. Like I mentioned before, one bandana may be longer than the other when you get to the end of your seam. That is totally fine!

Step 3: Press the seam to one side, toward the darker color (if one bandana is white or pastel). Now, go take these two back to your laid out row and match the next bandana to the correct colored bandana of the two that are already sewn together. Repeat Step 2 for each bandana until you have completed your entire row. Go lay this row down in it’s original order and complete the same steps for each row until you have your long “strips” complete.
Step 4: Now pick up two of your completed rows and match them, right sides together, ensuring you note the side that will be seamed together (remember my tip above to prevent the need to even pick up that seam-ripper!). Trying to match the seams of each bandana is not necessary here, but starting in the center of your rows match up the seams of one of the sets from each row and pin it together.
Then working from the center, pin the two rows together at about 6-inch intervals until both rows are together, not worrying about if the ends of the rows match (I promise it looks cute, country, boutiquey, whatever, this way. Just let it go). Make a 1/4-inch seam of your rows, back-stitch at the beginning and the end. Press the seam to one side. Go back to your other laid out rows and match the appropriate sides and sew them until all rows are sewn and pressed.
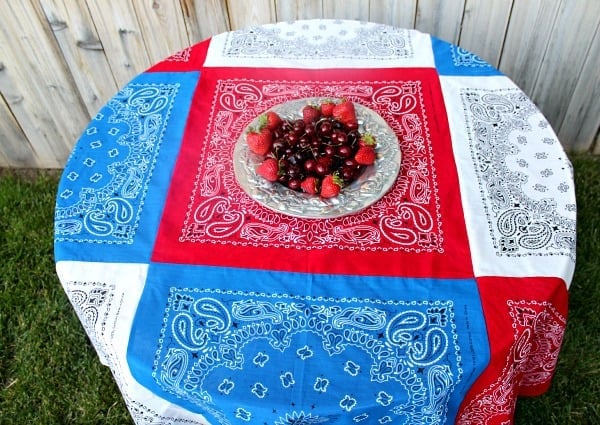
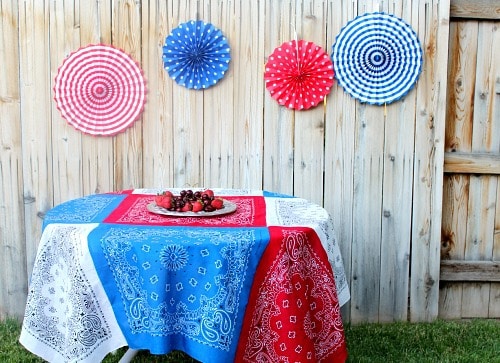
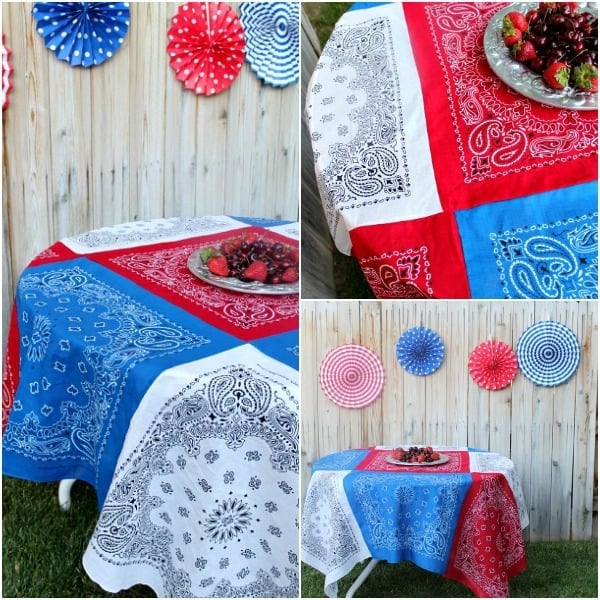
That’s it! Now go put it on your table and see how cute it is and realize that I was right that the corners don’t need to match at all! You’ll be placing centerpieces or plates with food, etc all over the table anyway so if it really is getting to you, just cover those shifted corners up.
I hope you like this project and will give it a try. Feel free to place any questions in the comment section and I’ll answer them as quickly as I can.

I recommend NOT washing them at all. They came out different sizes and was a nightmare to put together. Certainly did take an hour as you stated yours did.
When you say “measure the table and divide by 22” to figure out how many bandannas you need, what are you measuring? Length? Width? Both and adding them together and dividing by 22? Thanks!
Hi Karen, Sorry for my late reply. I just went in to the post and clarified it with an example. You basically measure the width plus the overhang on both sides, divide that by 22. Then also measure the length plus the overhand on both sides, divide that by 22. Then multiply both numbers that you divided by 22 by each other. Check out my new instructions and let me know if it doesn’t make sense.
That is the cutest tablecloth! and so easy! I think I’ll make this for our RS activity. Thanks for the great idea Sally!
What a wonderful craft! Thanks for sharing!
What a great idea. I love it!