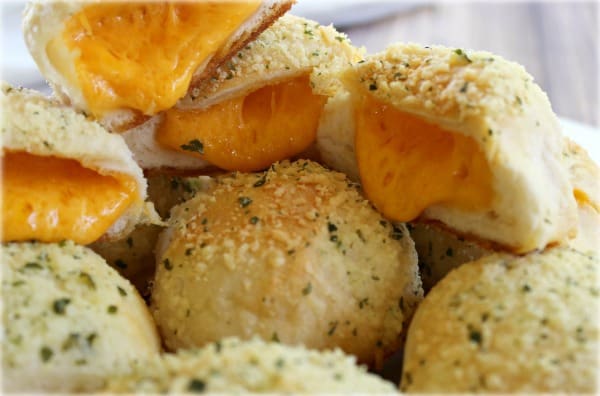
Golden on the outside, gooey on the inside—these Cheese Bombs are the definition of a crowd-pleasing, quick-bake recipe.
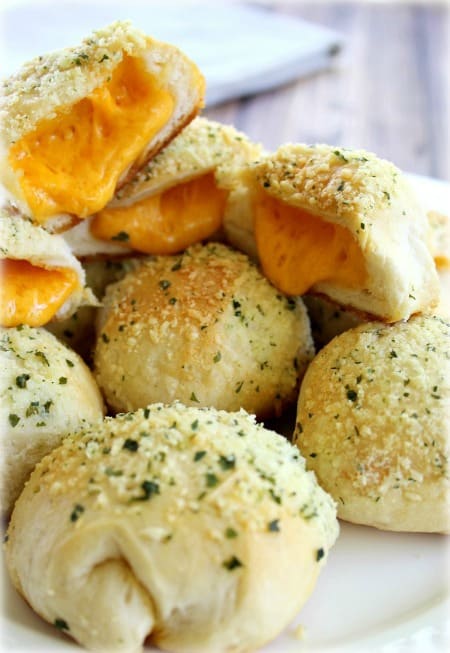
Cheese Bombs live up to their name by delivering an explosion of melty, cheesy flavor in every bite. Made with refrigerated biscuit dough, cubes of cheddar cheese, and a buttery Parmesan-garlic coating, these bite-size rolls bake in just about 15 minutes. They work perfectly as an appetizer, a kicked-up dinner roll, or a side dish for chili and soup. They disappear fast, so making a double batch is always a smart idea. While I once avoided refrigerated biscuits because of hydrogenated oils, I’ve found several better options made without them—Trader Joe’s being a great example—making this an easy recipe I’m happy to make again and again.
Why You’ll Love This Recipe
-
Only a handful of ingredients – Store-bought biscuits and cheese keep prep fast and stress-free.
-
Gooey, cheesy centers – Each bite delivers melty cheddar wrapped in soft, buttery dough.
-
Perfect for entertaining – Easy to scale up for parties, potlucks, or game day.
-
Customizable dips – Serve with Sriracha-mayo, ranch, marinara, or your favorite sauce.
-
Quick bake time – Ready in about 15 minutes, start to finish.
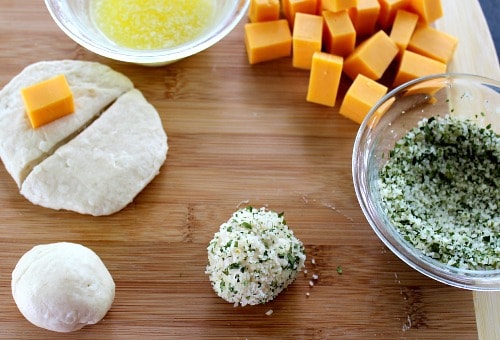
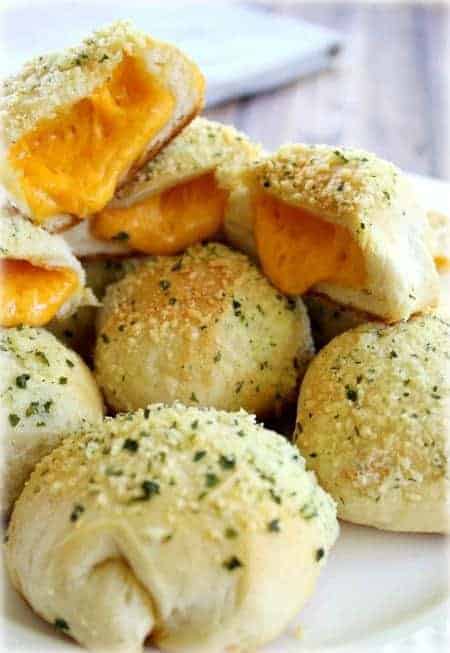
These Cheese Bombs come together easily, making this a fun recipe that kids can help with. Start by cutting each biscuit in half and gently flattening the dough with your fingers. Place a 1-inch cube of cheese in the center—I like medium cheddar—then wrap the dough around it like a blanket. Pinch the edges closed to seal completely, making sure there are no holes, and roll into a smooth ball. Repeat with the remaining dough and cheese. Once all the Cheese Bombs are formed, roll each one in melted butter, then coat with a mixture of chopped Parmesan, minced garlic, and dried parsley. Wait to begin the butter step until all the bombs are rolled, as butter on your hands can prevent the dough from sealing properly.

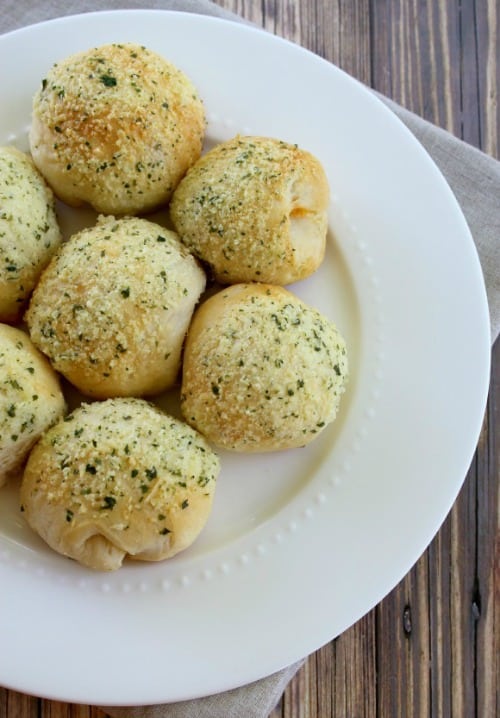
Place the Cheese Bombs on a parchment-lined baking sheet and bake for 12 to 14 minutes, or until golden brown. Even when the dough is sealed and rolled well, a little cheese may escape during baking. That’s completely normal and doesn’t affect the flavor. With practice, you’ll find that fewer Cheese Bombs burst open in the oven—so don’t worry and stick with it.
At first glance, these look inviting, smell wonderful and you know they’re going to be soft and tender. But the real treat is yet to come…
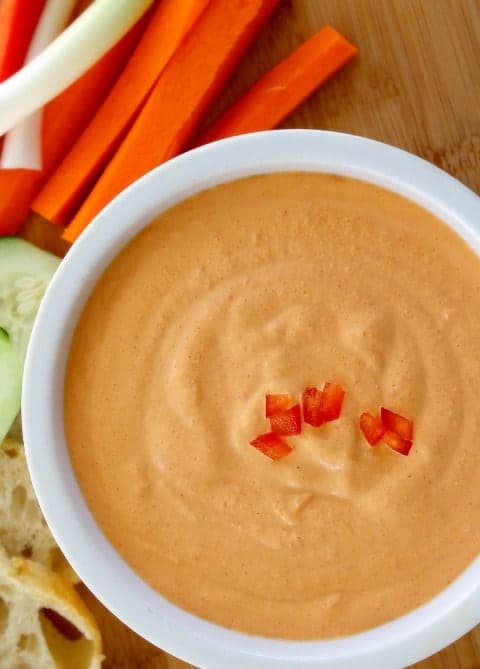
These cheese bombs ARE incredible, especially when served warm right out of the oven, they also reheat to perfection with just a couple of seconds in the microwave. Let your imagination go when thinking of various condiments and accompaniments. My daughter recommended Sriracha-mayonnaise and this was our clear favorite! Other suggestions could be; Thai Chili Sauce, salsa, homemade ranch dressing. Also, try adding chopped bacon or diced jalapeno peppers with the cheese inside the bombs. I’m going to try adding some diced apples, simmered with cinnamon and sugar, to the cheese for a dessert option. I’ll let you know how those turn out.
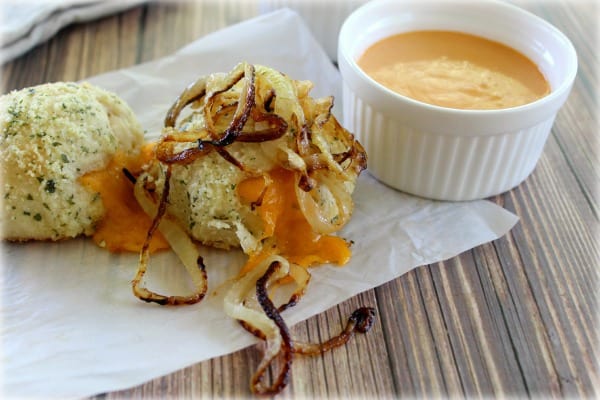
I’ve also served them with caramelized onions on top of the bombs. You could add the onions to the inside as well. Let me know what other variations you come up with.
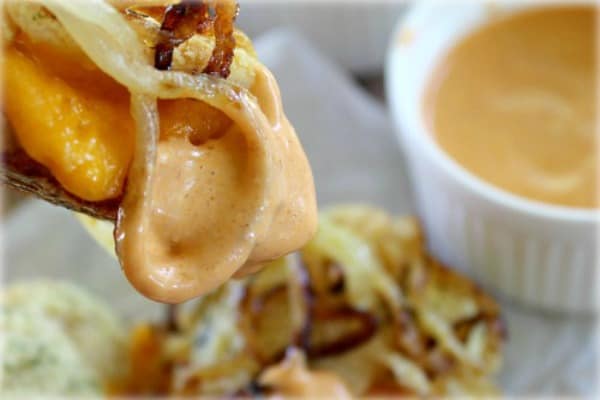
About that Sriracha-Mayo… This was so fabulous and gave the cheese bombs just the right amount of heat. If you like a lot of heat, serve with Sriracha straight up or increase the ratio of Sriracha to mayonnaise.
Serving Suggestions
Cheese Bombs are incredibly versatile and easy to serve with both casual meals and special gatherings. Set them out warm as an appetizer with dipping sauces like Sriracha-mayo, ranch dressing, marinara, or salsa. They also make a fun upgrade from traditional dinner rolls and pair especially well with hearty soups and chili. Serve them alongside pasta dishes, cozy weeknight meals, or as part of a game-day spread where warm, cheesy bites are always a hit.
These Cheese Bombs are proof that simple ingredients can turn into something truly special. Whether you serve them as a quick appetizer, a fun dinner roll, or alongside a cozy bowl of soup or chili, they’re always a hit. Easy to make, ready in about 15 minutes, and endlessly snackable, this is one of those recipes you’ll come back to again and again—especially when you need something warm, cheesy, and guaranteed to disappear fast.
Incredible Cheese Bombs
Ingredients
- 1 can refrigerator biscuits, 5 or 8 per package
- 8 ounces medium cheddar cheese, cut into 1-inch cubes
- 4 Tablespoons butter
- ½ cup shredded Parmesan cheese, chopped fine in a food processor or mini-chopper
- 1 teaspoon dried parsley flakes
- 2 cloves garlic, finely minced or grated in a microplane grater
Optional:
- Sriracha and mayonnaise for Sriracha-mayo, hot sauce, salsa, ranch dressing or any dipping sauce of your choosing
Cook's Note:
- Buy shredded Parmesan and chop it rather than use grated Parmesan. The grated cheese tastes too powdery. It's an extra step that is well worth the few extra seconds.
Instructions
- Depending on the type of biscuits you bought will determine the total number of cheese bombs you come up with. Pillsbury comes in packages of 5 biscuits, Immaculate comes in packages of 8 (So, you will have 10 or 16 bombs)
- Preheat oven to 375F degrees. Line a baking sheet with parchment paper.
- Cut 5-8 biscuit in half and slightly flatten with your fingers (don't worry about them being round). Place 1 cheese cube in the middle and wrap the biscuit dough around the cube like a blanket, ensuring the edges are sealed. Roll the cheese wrapped dough with your hands to make a ball shape. Complete this step with all the dough and cheese before going on to the next step.1 can refrigerator biscuits,, 8 ounces medium cheddar cheese,
- In a small bowl, melt 4 Tablespoons butter in the microwave, approximately 20 seconds. Set aside.4 Tablespoons butter
- In another small bowl, combine ½ cup Parmesan, 1 teaspoon dried parsley flakes and 2 minced garlic cloves. Stir to combine.½ cup shredded Parmesan cheese,, 1 teaspoon dried parsley flakes, 2 cloves garlic,
- One by one, roll each cheese bomb in butter and then roll or dip in the cheese mixture (If you dip, the Parmesan mixture will appear just on top of the bombs).
- Place each cheese bomb on the baking sheet approximately 2 inches apart.
- Bake on the center rack for 12-14 minutes or until bombs are golden. Depending on your oven, you might want to turn them half-way through the baking process to ensure even browning.
- Remove from oven and serve immediately. Alternately, once cooled they may be reheated in the microwave for about 20 seconds.
To Make Optional Sriracha-Mayonnaise:
- In a small bowl, mix Sriracha with mayonnaise until flavor and heat is to your liking.
- Store any leftovers in airtight containers and refrigerate. These keep well in the refrigerator for up to a week.
Notes
Notes & Tips
- Seal the dough well: Make sure the biscuit dough is fully wrapped around the cheese with no seams showing. This helps prevent cheese from leaking out while baking.
- Cheese options: Cheddar is classic, but mozzarella, Monterey Jack, Colby Jack, or pepper jack all melt well and work great here.
- Parmesan tip: Chopping shredded Parmesan instead of using grated gives better texture and flavor, and helps the coating stick to the dough.
- Reheating leftovers: Leftover Cheese Bombs reheat well in the microwave for about 20 seconds. They’re best warm, when the centers are still soft and melty.
Recipe adapted from Spend with Pennies.


These were a huge hit! We made some with cheddar and some with mozzarella cheese. The perfect balance of savory and cheesy.
Made these for friends and they disappeared so fast! The gooey, molten cheese center is incredible. Perfect for dipping in marinara and ranch.
Seriously, these are always a hit. Thanks for your comment Eliana!
I can’t get over how easy they were to make–the results were delicious! No changes made to the recipe.
OMG these are good… fluffy little balls of heaven! Thank you for sharing this amazing recipe Sally.
These are AMAZING!! My teenage girls and husband loved them. I made half using cheddar cheese and half using pepper jack cheese. My girls liked the pepper jack cheese flavored cheese bombs better. I didn’t have garlic cloves so I used garlic powder instead.
Rayna, Thanks for stopping by to tell me how these turned out for your family! I’ve used garlic powder when needed before too. Pepper Jack is awesome in the cheese bombs. Try adding some pickles next time. 🙂
I make my own biscuit dough, wondering if that would work? I will definitely be making these, can’t wait to try them. Thank you for sharing.
Hi Eddie, anything homemade and from scratch is my favorite everything. I think from-scratch biscuit dough would work, but they may possibly taste a bit more “bready”. I’m sure they’ll be delicious, just might be a bit different. Let me know how they turn out for you! Thanks for stopping by.
Hi i love this recipe and definitely want to try it one day but i can’t find the refrigerated biscuits in my local stores which makes me really sad, is there a substitute which i can use instead of the refrigerated biscuits?
Thanks
xx
Hi Dianne, does your grocer carry refrigerated crescent rolls? If so, look at the method I use to encase the Oreos in my recipe for Coal In The Snow and try that. Otherwise, you could use freezer rolls, thawed. I’ve made this recipe with refrigerator french bread dough and found them to be “not bad”, but not “incredible”, which, unfortunately, I imagine freezer rolls will be similar to the french bread dough. Good luck!
hoping to make these tomorrow – however, i can’t get the recipe to print! may have to write it out – don’t want to miss out on something so scrumptious!
Hi Helen, I was just able to print it out on my printer. When you click the purple print button and the printable version shows up, you might have to hit Ctrl P on your keyboard. Hope you like the recipe! Thanks for stopping by.
Is it possible to deep fry them. If so how long should put them in for?
Alex, I’ve never deep fried the cheese bombs so I don’t know how long to fry them. The butter, Parmesan, parsley and garlic that goes on the outside of the cheese bombs is such a big part of the flavor that I don’t think I can recommend this method. If you do attempt deep frying, let me know how they turn out. Thanks so much for your interest.
I want to try these and use basil instead of parsley. Maybe pepper jack cheese too. Yum!
Hi Beth, I’ve used basil myself before and it’s delicious. Gives the cheese bombs an Italian flavor. I haven’t tried pepper jack cheese, so let me know how they turn out if you do. I did make some last night with a couple of sliced green olives in with the cheese and a little black pepper on top. They were fabulous; I don’t think you can go wrong with almost any combination. I have tried a few “fancy” cheeses that didn’t turn out that well, though.
Sally!! I so enjoyed meeting you on the set of Studio 5. Thanks so much for the wonderful recipe & for a bite too! Would love to get together sometime.
Warmly, Michelle
Honey I’m Home
Michelle, I loved meeting you too and your segment was so cute and helpful (heading to Target for some thank you notes to send to the Studio 5 staff today, actually). I would love to get together sometime! God bless you, my dear.
Hi Sally,
I’m so impressed by your cheese bombs! I’m thinking that for those of us who prefer bread dough to biscuits, we can use pizza dough instead to make these cheese bombs. Have you tried baking it with pizza dough? I will try it out soon and keep you posted. Thanks for sharing!
Hi Siew, I haven’t used pizza dough but did have to substitute french bread dough the other day and they were fabulous.
Can’t wait to try these! One question: what is “non-GMO”?
Thanks –
Hi Beth, “non-GMO” means not ‘genetically modified’. Some people are concerned about that and some are not. I just mention it for those who are looking for non-GMO products.
First batch appears to be a success! My house smells like garlic heaven! Much easier to make than I feared.
Incredible is an understatement! I can’t believe how much my family loves these! They have endless possibilities for what to add in them. If you like a little kick- add crushed red pepper flakes to the tops!