
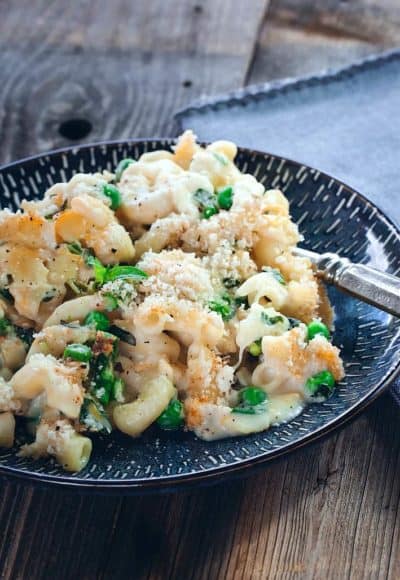
The problem with chicken breast meat is that sometimes the chicken turns out dry, as in most of the time. Learn how to brine chicken breasts and infuse tenderness into white-meat poultry in as little as four hours.
When it comes to “what’s for dinner?”, chicken seems to be the million dollar answer. And here in America the chicken breast rules. The problem with chicken breasts is that sometimes they turn out dry, as in most of the time. We all seem to have our winning ways for cooking it in sauce, adding some kind of canned condensed soup or melted cheese. We cook it all day in our slow cookers and just plain give the chicken something to swim in so the dry meat is not so, well, dry . There are so many chicken casserole and crockpot recipes for such concoctions on Pinterest, I couldn’t get them all to load in the search. Believe me, I’m constantly looking for marinades, sauces and dips to serve with my chicken, too. Then one day I realized that I hardly ever cook “naked” chicken breasts. So, I went searching and here is what I’ve done. Let’s brine some chicken breasts, in as little as four hours.
Brining is a great way to infuse tenderness into white-meat poultry and many of us do this with a big turkey at Thanksgiving. Well, here is a nice brining method for chicken breasts that appeals to me because trying to keep that big 20 pound turkey submerged and cold enough out on the deck was quite stressful and labor intensive, at least for me and yes I know it’s only once a year. But plopping a few bone-in chicken breasts in a bowl or bag after just 10 minutes of prep, soaking for only four hours and then roasting them up to perfection with very little clean up? Come on, we’ll do it together.
Let’s talk about what types of chicken breasts to buy for brining*. Options range from boneless and skinless, bone-in with or without skin and even cutlets or tenders. To get the most flavor and moistness, bone-in with skin on is your best option. The bone adds flavor from the marrow and helps with the problem of dry chicken. Trust me or just reference the photo below.
This brine recipe will work for as few as two chicken breasts and as many as eight. Now print this out, grab your favorite beverage, put your feet up and read through the steps then come back to the kitchen or run to the store and make yourself some super juicy, flavorful chicken that everyone will love.
Step 1: Purchase your chicken breasts. Look for meat that has good color and smell (Yes, smell. Chicken should have almost no discerning odor other than freshness that makes you think it’s going to taste good).
Step 2: Assemble your brining ingredients. This is a simple brine and I used the following ingredients. Note: Do not adjust the salt, sugar, water or ice but you can adjust some of the other spices to your liking or what you have on hand. Feel free to experiment.
- Ingredients
- 1 cup Kosher salt
- 1/2 cup sugar
- 6 cups water
- 8 – 10 cups ice
- 1 teaspoon mustard seed
- 1 teaspoon coriander
- 1 teaspoon black pepper
- 2 bay leaves
- 1 teaspoon caraway
- 1 teaspoon allspice
- Equipment needed and special considerations
- Stockpot for heating spices and dissolving salt and sugar
- Pot, huge ziploc bag (they make them) or a bowl big enough to hold the chicken breasts and brine, depending on the number of breasts you are brining
- Plate, bowl, rocks or other “weight” to keep chicken submerged
- Enough room in your refrigerator for chicken breasts to soak, or a cooler or cold weather (between 33F and 40F degrees)
I used whole spices but you can use ground or a combination. If using whole spices, you can break them out a bit with a mortar and pestle or spice grinder if you have either. I just threw them in whole because the flavors will infuse in the heated salt water.
Step 3: Dissolving ingredients in the water. In a large stock pot, add the sugar, salt and water. Heat over medium just until the sugar and salt have dissolved. Then add the remaining seasonings. Stir and immediately remove from the heat.
Step 4: Cool the brine with some ice. Add 8 to 10 cups of ice to the water. Stir until temperature is cooled.
Step 5: Place chicken in brine and complete the brining process. Place your chicken in the bowl, pot or zip lock bag you will be brining in (I will refer to a bowl for now). Pour the brine over the chicken in the bowl and then place something on the chicken to make sure it stays submerged (not necessary in ziploc). Options include: Plate with bowl or rock on top, pie weights in a ziplock bag, craft rocks in bag, you get the idea. Now place your bowl of chicken into either your refrigerator or cooler. You need to maintain the temperature of the chicken between 33 and 40 degrees for the entire brining time. Since I only brined three breasts this time, my refrigerator worked great. Let the chicken brine for four to six hours. You do not want to brine for longer than this because the salt will overpower the flavor if brined too long. (I have had to take them out at 3 1/2 hours before and they were still delicious)
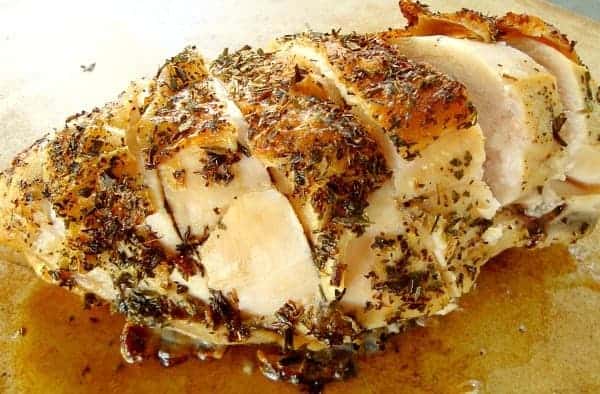
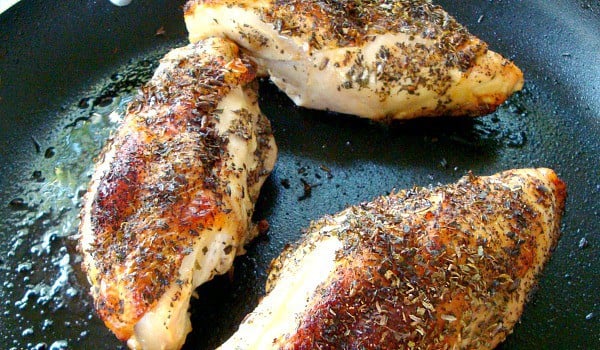
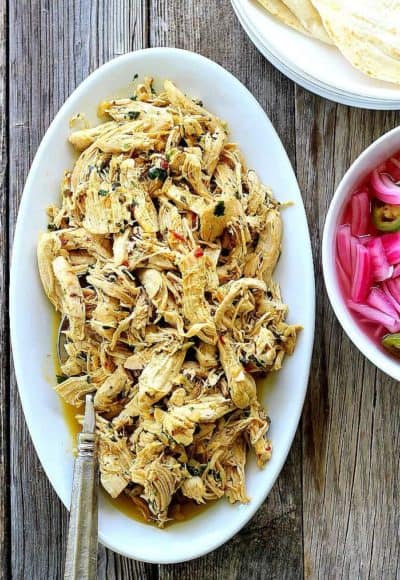
Step 6: Remove chicken from brine, discard brine and rinse the chicken under cold water to remove excess brine. Cook your chicken either on the grill, in a skillet or make these foolproof, Oven Roasted Chicken Breasts with minimal cleanup.
In no time, you can serve up a nice, juicy, flavorful chicken breast to rival any rotisserie chicken on a spit.
Recipe from Good Dinner Mom’s kitchen.
*Note on sodium content concerns: This is just my opinion founded on some education and experience. Do NOT buy already enhanced meat for brining. Just buy natural (free-range if you can) chicken breasts. Unless you are brining your meat every single day, do not worry about the sodium content, which is why this method of brining for a small length of time is optimal. Be more concerned with the sodium content in the canned condensed soups and salted gravies that we frequently purchase. However, if you have health concerns like high blood pressure or heart disease, you might skip brining altogether.


Can brined chicken be fried?
I know this is a very late reply, but yes, you can fry brined chicken. I make home cooked chicken strips and brine boneless skinless breasts before slicing into strips, flouring, then fry. They are amazing.
I’ve got my chicken brining for tomorrow’s smoker! Can’t wait!
It smells delicious.
Thanks Jackie! Let me know how it turns out. 🙂
can i brine and then freeze them for later use or do they need to be brined fresh
Hi Kathy, I have never done this but did a little research and it appears that the chicken should be just fine if you brine it and then freeze. Let me know if you do that how they turn out.
On Step 6 I would add a rinse in cold water after the taking them out of the brine. The brine that clings to unrinsed, brined chicken adds too much extra salt.
Thanks for that suggestion Eric. You’re right. Going to modify the recipe now. Good idea.